This article on the 12th (Prince of Wales’s Royal) Lancers will provide you with an overview of the Regiment’s activities during the First World War and will help you to research those who served with it. I have also written a series of guides to help you research British soldiers who served in the war:
The 12th (Prince of Wales’s Royal) Lancers in the First World War
When Britain declared war on Germany on 4 August 1914, the 12th (Prince of Wales’s Royal) Lancers was stationed at Norwich, with C Squadron detached at Wormald. On 17 August 1914, the Regiment landed in France as part of the 5th Cavalry Brigade which also contained the 2nd Dragoons (Royal Scots Greys) and 20th Hussars. Initially independent, the Brigade joined Gough’s Command on 6 September which became the 2nd Cavalry Division on 16 September. The 12th Lancers served with the 5th Cavalry Brigade for the duration of the war which remained in the 2nd Cavalry Division. The 12th Lancers was engaged shortly after arrival in France and its first main engagement was helping to cover the retreat from the Battle of Mons fought on 23 August. At Moy on 28 August, C Squadron made a successful charge while covered by rifle fire from A and B Squadrons. One of the casualties during the charge was the Regiment’s commanding officer Lieutenant-Colonel Frank Wormald who was wounded.
Over the next month and a half, the Regiment moved frequently as a system of trenches began to form across France and Belgium. The Regiment played a dismounted role in the trenches during the First Battle of Ypres before being withdrawn from the front line. Over the next three years, the 12th Lancers spent long periods behind the front line while providing working parties on a variety of task. The heaviest casualties during this period occurred during the opening days of the Battle of Arras which began on 9 April 1917, with the unit subjected to heavy artillery fire on 10th and 11th which caused over fifty casualties and killed over 100 horses. The Dismounted Company of the Regiment was in action at Bourlon Wood in November 1917 during the Battle of Cambrai. However, the entire Regiment wasn’t engaged until the German Spring Offensive in March 1918. The same year, the 12th Lancers took part in the Hundred Days Offensive. On 11 November 1918, the Regiment was at Solre-le-Château with one squadron at Hestrud. Later in the day, the 12th Lancers moved to Eccles.
Researching a Soldier who Served in the 12th Lancers during the First World War
I’d recommend starting with my generic guides to researching British soldiers which will help you find medal and service records of those who served with the Regiment. My page on abbreviations and acronyms will be of use as you’ll encounter a lot of military jargon. The primary source of information for the Regiment will be its two war diaries which you can combine with the regimental history The 12th Royal Lancers in France, August 17th 1914 – November 11th, 1918. These sources will give you a solid foundation which you can build on with other documents, for example, the 5th Cavalry Brigade Headquarters war diary.
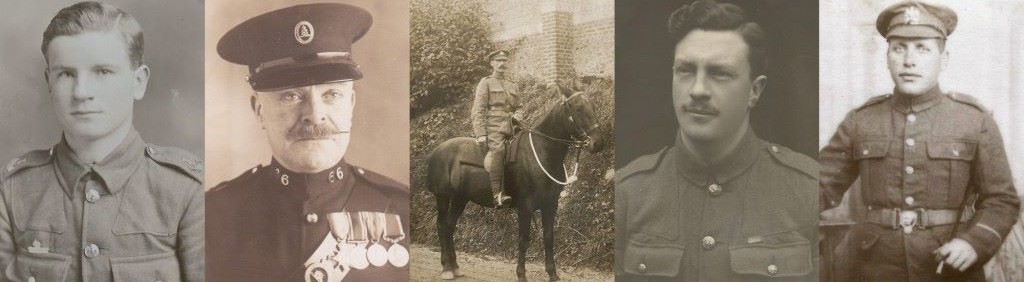
Researching Officers: You will need to check to see if a service record for the officer is held at the National Archives. Only seven appear when “12 Lancers” is searched but there will be more as many officers transferred to different regiments or corps. If an officer served past April 1922 then their service record should still be with the Ministry of Defence. The link will take you to a page on my Second World War website as I have written a guide to ordering these files. No death certificate is needed, nor the permission of the next of kin. It is a straightforward process which will take you less than five minutes. Cavalry officers tend to be easy to research and you’ll find them mentioned frequently throughout the war diary. There are group photographs in the regimental history which also records all the officers who served with the Regiment between 17 August 1914 and 11 November 1918 with the date they joined.
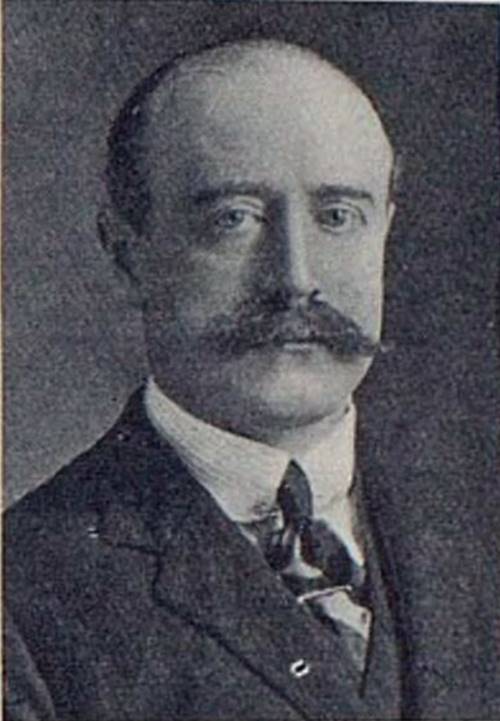 Major Eustace Crawley was killed in action on 2 November 1914 and is commemorated on the Ypres (Menin Gate) Memorial to the missing. This photograph was published in The Sphere, 12 December 1914 on a page containing portraits of fallen officers. The Sphere is a great newspaper to search if you’re looking for an officer casualty and is available to view on FindmyPast. There is no service record for Major Crawley at the National Archives. I have found that if an officer was killed within the first year of the war, there’s less likely to be a surviving record.
Other Ranks: Finding a service record will be key to researching a soldier who served in the ranks, though if a soldier served past January 1921 it should be at the National Archives. It’s a straightforward process as no death certificate is needed or the permission of the next of kin. A good source to check is the Royal Tank Corps enlistment records 1919-1934 on FindmyPast as the 12th Lancers was mechanised post-war and incorporated into the Corps. A lot of service records to those who served in the 12th Lancers were destroyed in the Blitz in 1940, so medal records are going to be key. These will be the soldier’s medal index card and medal roll, there will be two of the latter if they qualified for the 1914 or 1914-15 Star.
An approximate enlistment date can usually be worked out from a soldier’s regimental number. However, there are two numbering series, so you have to be careful. Prior to 1906, each lancer regiment had its own number series so there would in theory be men with the same regimental number in each of the five lancer regiments. From December 1906 onwards, all five lancer regiments used the same number series, with those who had enlisted prior to this date keeping their original regimental number. You should be able to work out which number series your lancer belongs to from their date of birth. There is a list of soldiers who died during the war in the regimental history but you can also find this information by searching the Commonwealth War Graves Commission website. If you’re searching for a soldier who was believed to have been wounded and no service record has survived look at my guide to First World War casualty lists.
If you’re researching a First World War soldier, you’ll need to search the records on FindmyPast and Ancestry. Both sites offer a free trial period and if you live in Britain you can often access them for free at your local library,
War Diaries of the 12th (Prince of Wales’s Royal) Lancers
There are two war diaries for the 12th Lancers and both have been digitized by the National Archives and can be downloaded for a small fee by clicking the blue links below. War diaries were written by an officer of a unit and recorded its location and activities and often contain appendices in the form of orders, accounts of battles, maps etc. The war diaries of the 5th Cavalry Brigade Headquarters will also add more information. An account of the Regiment’s charge near Moy de L’Aisne on 28 August 1914 appears at the bottom of the page.
- Date: 16 August 1914 – 31 March 1919
- 5th Cavalry Brigade, 2nd Cavalry Division
- Reference: WO 95/1140/1
- Notes: A good war diary with detailed entries when the Regiment is in action. However, like other cavalry regiments, when the 12th Lancers are behind the front the entries are short and repetitive. A lot of the war diary is typed.
- Date: 01 April – 31 August 1919
- Lancer Brigade
- Reference: WO 95/1166/3
- Notes: A more detailed post-war diary than is usually found which has been typed.
Regimental History of the 12th Lancers
There are two regimental histories which concern the 12th Lancers’ activities during the First World War. The first is a general history of the Regiment: The History of the XII Royal Lancers (Prince of Wales’s) by Capt. P. T. Stewart 1950 and you can find a reasonably priced copy online. The second is a small volume which was published in 1921: The 12th Royal Lancers in France, August 17th 1914 – November 11th, 1918 by Major H. V. S. Charrington. This book was reprinted by the Naval and Military Press in 2007 and can be bought online.
Further Sources
The Imperial War Museum holds a thirteen-page memoir written by A. C. Hannant chronicling his service during and after the First World War. Hannant served with the 12th Lancers in 1914 and 1915: Documents.7500.
The Liddell Hart Military Archives holds the papers of Brigadier General Harold Vincent Spencer Charrington who served with the 12th Lancers during the war: GB0099 KCLMA Charrington.
Extract from the war diary of the 12th Lancers
The transcription below appears as an appendix in the 12th Lancers’ war diary in August 1914 which isn’t dated nor is there any indication of who wrote it. The appendix describes the Regiment’s successful attack on German cavalry near the village of Moy de L’Aisne, France on 28 August 1914.
Moy, 28 August 1914
At 3.a.m., on the morning of the 28th August, 1914, the 12th Royal Lancers was hurriedly turned out from its bivouac at Bernot, and rendezvoused on some high ground to the southwest of St. Quentin with the rest of the 5th Cavalry Brigade, where it halted for about half an hour, allowing time to draw rations which had been hurriedly sent up in lorries by the zealous officer in charge. Moving off again towards St. Quentin, it halted undercover, and two officers patrols were despatched to Neuville and Mesnil St Laurent. These patrols, on their return, reported that there was no sign of the enemy, and that they had been unable to obtain any news of them from the inhabitants.
About 10.30 a.m., orders were received from Brigade Headquarters that the Regiment was to go into Brigade Reserve for the day at Moy on the Oise. This was welcome news, as it was an exceedingly hot day, and men and horses would all be better for a good rest. The Regiment arrived at Moy about noon, where, after watering, the horses were off-saddled and fed in the chateau grounds of the village. Officers and men availed themselves of the lake to have a thorough wash-up and shave.
At 4.10.p.m., on hearing shots being fired from the direction of Cerizy, where the Scots Greys were providing day outposts with the 20th Hussars in close support, the Colonel at once gave orders to the Regiment to “Saddle-up” and follow, whilst he went on ahead with his Headquarters to ascertain what was happening. “C” Squadron, which had saddled up in an incredibly short space of time under Captain J. C. Mitchell, closely followed by the Machine Gun Section under Lieutenant W. R. Styles, whose men were overhauling their gun equipment and pack-saddlery at the time, were soon on the scene.
On getting into the open country outside the village, a Squadron of German Cavalry about 800 yards away was at once seen moving in very close formation down the hill towards Moy. “C” Squadron at once dismounted and opened fire, sending their horses into some dead ground for cover, the Machine Gun Section coming into action in the same way. The German Cavalry, as soon as they came under fire, at once dismounted in the open on the front face of the hill, sending their horses back over the crest under the heavy fire from “C” Squadron, and the Machine Gun Section, which eventually caused them to stampede.
As soon as “A” & “B” Squadrons arrived a few minutes later, they were ordered to move under cover to the high ground on the enemy’s left flank, and engage the enemy with dismounted fire. This manoeuvre was admirably carried out, every opportunity being taken to use the cover which the folds in the ground afforded and signalling communication being established as soon as the Squadrons were in position. In the meanwhile, whilst “A” & “B” Squadrons were moving to this flank, a Section of guns from “J” Battery arrived and came into action on “C” Squadron’s left rear, shelling the dismounted German Cavalry, and a wood in their rear which was suspected to hold the rest of the German Cavalry Brigade. The Brigadier-General Sir P. Chetwode, shortly afterwards arrived on the scene, and expressed himself satisfied with Lieutenant-Colonel Wormald’s action and dispositions. By this time, the enemy had retired to the crest of the hill, maintaining a brisk and accurate fire on “C” Squadron all the time.
As soon as “A” & “B” Squadrons had reached their positions, the Colonel gave orders to “C” Squadron to mount in order to move to a position nearer to the enemy for further dismounted action, covered by the fire of the flanking Squadrons at the same time despatching his Adjutant to reconnoitre the ground between ? and “A” Squadron gain touch with them and return. The Adjutant found that the ground immediately in front of the position which the enemy were holding, was so dead that it was possible to approach within 50 yards of them unseen, and on his return, reported this fact to the Colonel, whom he met moving up at the head of “C” Squadron suggesting at the same time that, owing to this advantage, it would be an excellent opportunity to resort to shock tactics, as the enemy’s attention was fully occupied [by the] fire of “A” & “B” Squadrons.
The Colonel at once ordered “C” Squadron forward at the walk as the ground over which they were moving was getting steeper, and he wished to keep the horses as fresh as possible for the final charge. Just before reaching the crest, he gave orders to “Form Squadrons” as the Squadron was moving.
In “Line of Troop Columns” over the rough ground, as they topped the crest and came in sight of the enemy, he gave the order “Gallop” and “Charge” the latter call being taken up by the “C” Squadron trumpeter. In a perfect line, with a ringing cheer, the Squadron, with Lieutenant-Colonel Wormald and his two orderlies and the Trumpet Major about 30 yards ahead and the Adjutant on his left, raced across the remaining 50 yards that separated them from the enemy. The German Cavalrymen for the most part fought exceedingly gallantry, though a few put up their hands or laid down in the roots.
The Colonel was immediately wounded and his horse shot dead, though not before he had transfixed his man so thoroughly that his sword buckled and remained firmly embedded in the German soldier’s body. One of his orderlies, Pte Nolan was killed, and the other (Pte Casey), after having his horse shot under him, extricated himself and his rifle and accounted for four Germans. Trumpet-Major Mowlam who was following the Colonel, was severely wounded in the thigh, the only one of the Headquarter Party being the Adjutant, Capt Bryant, who accounted for no less than 5 Germans with his own sword.
Capt Mitchell was killed at the head of “C” Squadron in the first charge, shot through the head by a well-aimed German bullet, but otherwise casualties were very small, four men being killed and Lieut Col Wormald and five men wounded. As soon as “C” Squadron had broken completely through the German position; Lieut R. Wyndham Quinn quickly rallied them, and charged back through the position, accounting for a few more of the enemy en route. Then, rallying again, the Squadron once more charged up the hill, but the enemy had by then been accounted for, except four unwounded men who were discovered hiding in the roots, and who were taken prisoner.
In the meanwhile “A” & “B” Squadrons had brought a very effective fire to bear on the remainder of this German Regiment, who attempted to move forward from the wood in rear, supported by the fire of the Regimental Machine Gun Section; and “J” Battery Royal Horse Artillery’s Section of guns. A fresh German Regiment, which attempted to move forward to support of the original advanced guard Squadron was stopped in an equally effective manner. Simultaneously with this action; the Scots Greys and the 20th Hussars were closely engaged with a third enemy Regiment, which was attempting to enfilade the left flank of the 12th Lancers. The 20th Hussars silencing, with their accurate rifle fire a German Battery which attempted to come into action; almost before it had fired a single round. Both these Regiments inflicted very heavy casualties on the enemy. The whole action was a very fine example of combined fire and shock action, and of the cavalry pre-war training, both with rifle and lance.
The losses suffered by this German Cavalry Brigade must have put it out of action as a fighting Unit for several days, as well as inflict a very severe blow to its morale. Of the Squadron engaged by “C” Squadron 75 to 80 killed and wounded were counted on the ground after the action, 4 unwounded prisoners being taken, as already mentioned. The actual fight took place in the vicinity of the farm of Cerizy, but to the 12th Lancers this engagement will always be known as Moy.